• Link to Facebook
  • Link to Pinterest
  • Link to LinkedIn
  • Link to Icon_name
Put Your Home In Our Hands
J.E.P. Contracting
  • Home
  • About
    • Happy Clients
    • Recent Projects
  • Process
  • Services
  • Gallery
  • Resources
    • Ebooks
    • Blogs
    • FAQs
    • Recommended Vendors
  • Careers
  • Contact
  • Book an appointment
  • Menu Menu
Two-story beige wooden house with peeling siding and a centered front porch supported by decorative columns, two front doors side by side.

Lead-Safe Renovations: Protecting Your Family in Older Massachusetts Homes

May 15, 2026/in Blogs, Renovations/by Patrick Perkins

If your Worcester home was built before 1978, there’s something important you should know before your next renovation project begins: lead paint may be present, and disturbing it without the right precautions can pose a serious health risk to your family.

This isn’t a reason to avoid renovation, far from it. But it is a reason to work with a contractor who takes lead safety seriously and has the certification, training, and processes to handle it correctly. At J.E.P. Contracting, lead-safe renovation is a standard part of how we work in older Massachusetts homes, not an afterthought.

Here’s what every homeowner in an older Worcester home needs to understand.

Understanding the Lead Risk in Pre-1978 Homes

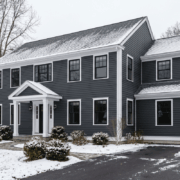
Lead-based paint was a common building material in the United States until it was banned for residential use in 1978. Nationally, an estimated 40 million homes still contain lead paint. In a city like Worcester, where a significant portion of the housing stock was built in the early to mid-20th century, the likelihood that your home contains lead is high.

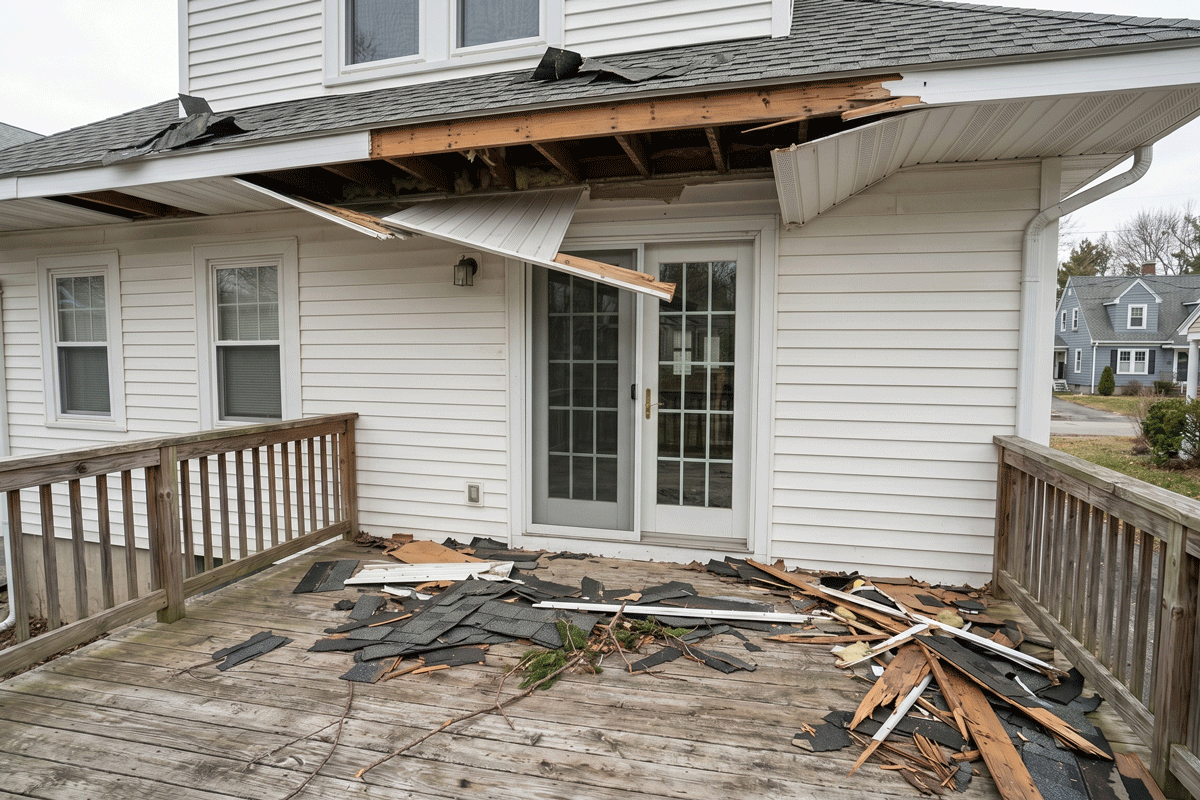
Lead paint that is intact and undisturbed typically poses limited risk. The danger arises from sanding, scraping, cutting, or demolition activities that are common in renovation projects. These actions release lead dust and particles into the air and onto surfaces, where they can be inhaled or ingested, particularly by young children.

Who Is Most at Risk?

Children under six are the most vulnerable population. Their developing nervous systems are especially sensitive to lead exposure, and even low levels can cause irreversible harm, including developmental delays, learning difficulties, and behavioral problems. Pregnant women are also at elevated risk; lead can cross the placental barrier and affect fetal development.

Adults are not immune either. Lead exposure in adults is associated with elevated blood pressure, kidney problems, and other serious health effects. This is a risk that affects the entire household, not just the youngest members.

What the EPA’s RRP Rule Requires

The Environmental Protection Agency’s Renovation, Repair, and Painting (RRP) Rule was established specifically to address the risks created when contractors disturb lead-based paint during renovation work. It applies to all renovation projects in homes, childcare facilities, and schools built before 1978 that involve disturbing painted surfaces.

Under the RRP Rule, contractors working in these environments must:

  • Be certified by the EPA or an EPA-authorized state program
  • Use lead-safe work practices on every qualifying job
  • Follow specific containment, cleanup, and waste disposal procedures
  • Provide homeowners with the EPA’s “Renovate Right” pamphlet before work begins

In Massachusetts, the state’s Department of Labor Standards also maintains its own lead-safe certification and training requirements, adding another layer of oversight for contractors working in older homes.

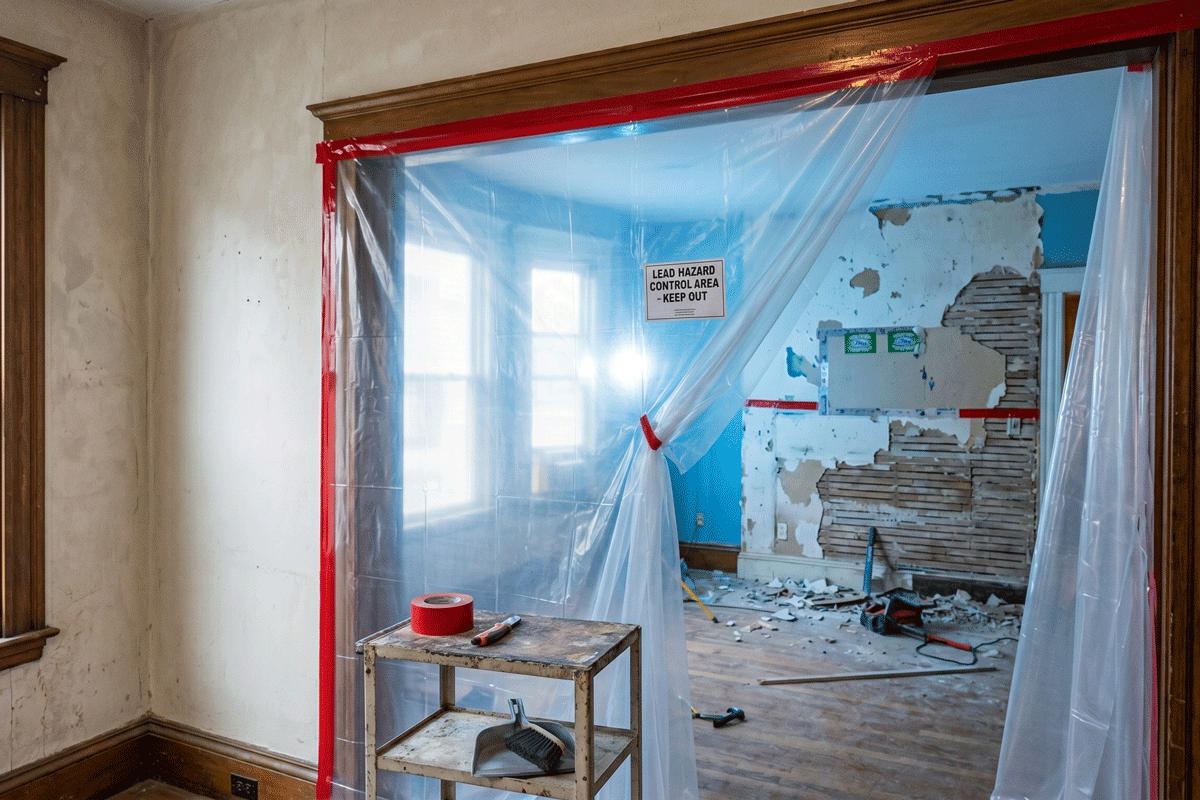
What Are Lead-Safe Work Practices?

Lead-safe work practices are a specific set of procedures designed to minimize the creation and spread of lead dust during renovation. They include:

  • Isolating the work area with plastic sheeting and barriers
  • Closing HVAC systems to prevent dust circulation
  • Using wet methods and HEPA-equipped tools during sanding and cutting
  • Thorough, systematic cleanup during and after the work
  • Post-work testing to confirm lead dust levels are within safe limits

These practices add time and care to the job, but they are non-negotiable when working in a pre-1978 home where children or pregnant women live.

How J.E.P. Contracting Handles Lead Safety

At J.E.P. Contracting, lead-safe practices aren’t something we add on as an inconvenience; they’re built into our renovation process from the start. Our team is EPA RRP certified and trained to work in the older Worcester homes that make up a significant portion of our project portfolio.

Pre-Renovation Assessment

Before renovation begins in any pre-1978 home, we discuss lead risk with our clients, identify potential lead paint disturbance areas, and plan our work accordingly. Where appropriate, we recommend lead paint testing to establish a clear picture of what’s present before work begins.

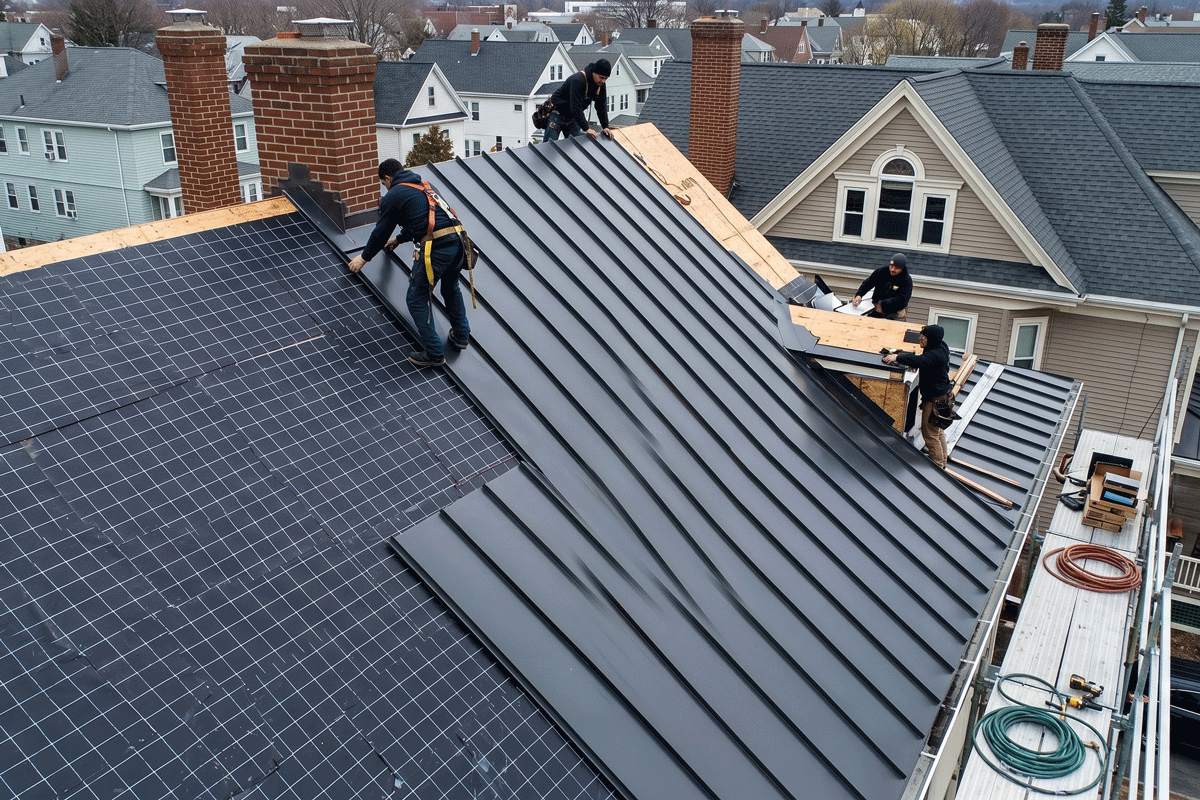
Integrated Lead-Safe Execution

Our crews apply lead-safe containment and cleanup protocols throughout the renovation, not just in certain areas or phases. This means your family is protected throughout the entire project, not just during specific high-risk activities.

The Design-Build Advantage

Because the same team at J.E.P. Contracting manages design and construction, we can design renovation scopes that are mindful of lead risk from the outset, sometimes identifying opportunities to minimize disturbance of lead-painted surfaces while still achieving your renovation goals. This integrated approach reduces both risk and cost.

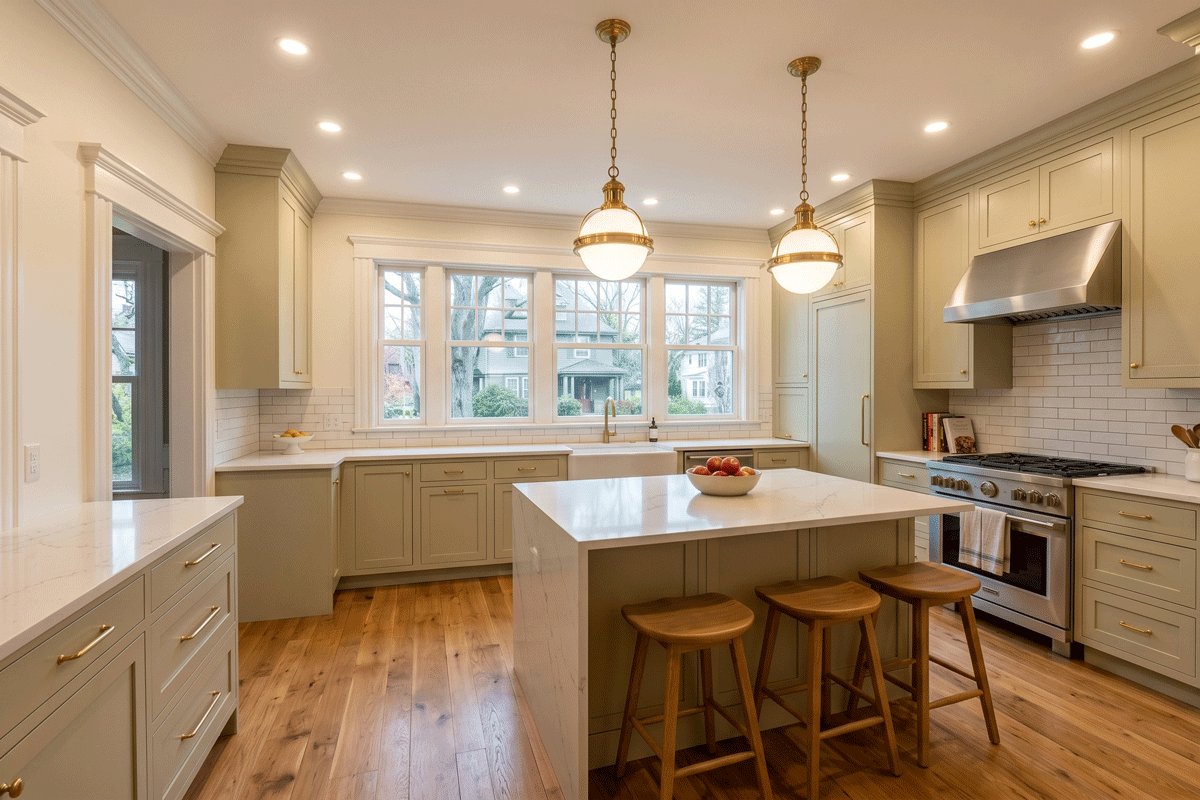
The Benefits of Lead-Safe Renovation During a Remodel

Many homeowners worry that lead-safe requirements will significantly inflate the cost or timeline of their renovation. In practice, working with a certified contractor who integrates these practices efficiently minimizes the impact. And the benefits far outweigh any incremental cost:


  • Peace of mind: Knowing your family is protected throughout the renovation is priceless, especially if you have young children or are expecting.
  • Compliance: Hiring a certified contractor ensures your project meets all state and federal requirements, protecting you from potential liability.
  • Property value: A properly documented, lead-safe renovation is an asset if you ever sell your home.
  • Long-term health: Preventing lead exposure now avoids the health consequences and associated costs of exposure later.

Conclusion

Renovating an older Worcester home is an investment in your family’s future. Done right with qualified professionals who treat lead safety as a core commitment, it’s also safe.

J.E.P. Contracting has the certification, experience, and care to handle renovation in pre-1978 Massachusetts homes with the seriousness those projects deserve. We protect your family as if it were our own.

Planning a renovation in an older Worcester home? Contact J.E.P. Contracting today to discuss your project and learn how we keep your family safe throughout the process.

Frequently Asked Questions

Q: How do I know if my home has lead paint?

Any home built before 1978 may contain lead paint. A certified lead inspector or risk assessor can test your home’s painted surfaces to determine if lead is present and in what condition.

Q: Do all renovations in a pre-1978 home require lead-safe practices?

The EPA’s RRP Rule applies when painted surfaces are disturbed in pre-1978 homes. If no paint disturbance is involved, the rule may not apply, but our team assesses each project individually.

Q: Can my family stay in the home during a lead-safe renovation?

It depends on the scope of work. For significant disturbance of lead-painted surfaces, we typically recommend that young children and pregnant women stay elsewhere during active work phases. We’ll advise you based on your specific project.

Q: Is J.E.P. Contracting EPA RRP certified?

Yes. Our team is EPA RRP certified and trained to perform lead-safe renovation work in accordance with all applicable state and federal requirements.

Two-story beige house with a torn roof covered by a blue tarp, a worker on a ladder, and debris scattered across the yard after a storm fall.

Insurance Restoration Done Right: Navigating Claims and Recovery in Massachusetts

April 15, 2026/in Blogs/by Patrick Perkins

Dealing with damage to your home is stressful enough. Navigating the insurance claim process on top of finding a qualified contractor and getting your family’s life back to normal can feel completely overwhelming. For many Worcester homeowners, the insurance restoration process is unfamiliar territory at the worst possible time.

At J.E.P. Contracting, insurance restoration is a specialized area of our practice. We’ve guided Worcester families through storm, fire, and water damage recovery, and we know how to move the process forward efficiently, professionally, and with your best interests in mind.

Here’s what you need to know when disaster strikes your Massachusetts home.

Understanding Insurance Restoration: What It Is and When It Applies

Insurance restoration refers to the repair or reconstruction of a home following damage covered by your homeowner’s insurance policy. Common triggering events include:

  • Storm damage: Wind, hail, fallen trees, and ice damage from nor’easters and severe weather events
  • Fire and smoke damage: From house fires, kitchen fires, and neighboring structure fires
  • Water damage: From burst pipes, appliance failures, roof leaks, or flooding events
  • Structural damage: From vehicle impact or other sudden events

When these events occur, your homeowner’s policy, assuming your coverage is in good standing, is designed to cover the cost of restoring your home to its pre-damage condition. The claim process, however, is rarely as simple as it sounds.

The Step-by-Step Insurance Restoration Process

Step 1: Document Everything Immediately

Before any cleanup or temporary repairs begin, document the damage thoroughly. Photograph and video every affected area: walls, ceilings, floors, personal property, and exterior damage. This documentation is the foundation of your claim and can significantly impact the settlement you receive.

If emergency stabilization is needed (tarping a damaged roof, boarding broken windows), take these temporary measures to protect your home from further damage; they are typically covered. But document before and after.

Step 2: Report Your Claim Promptly

Notify your insurance company as soon as possible. Most policies require prompt reporting, and delays can complicate your claim. Have your policy number, documentation of damage, and a general description of the event ready when you call.

Step 3: Meet with the Insurance Adjuster

Your insurance company will assign an adjuster to assess the damage and determine the scope and value of your claim. This is one of the most critical steps in the process; the adjuster’s assessment directly determines your initial settlement offer.

You are not required to accept the adjuster’s assessment as final. If you believe the assessment undervalues the damage or misses affected areas, you have the right to dispute it, request a reinspection, or engage a public adjuster on your behalf.

Step 4: Get a Professional Contractor Assessment

Before agreeing to a settlement figure, have a qualified restoration contractor assess the damage independently. A contractor who specializes in insurance restoration knows how to identify the full scope of damage, including hidden moisture, structural issues, and code-compliance upgrades that adjusters sometimes miss.

At J.E.P. Contracting, our insurance restoration assessments are thorough and honest. We document what we find, communicate clearly with adjusters, and advocate for the proper scope of work to fully restore your home.

Step 5: Scope Agreement and Contracts

Once the claim scope is agreed upon, the restoration contractor prepares a detailed scope of work. This document serves as the basis for the restoration contract and ensures that all homeowners, insurers, and contractors are aligned on what will be done.

Step 6: Restoration Work Begins

With scope and funding confirmed, restoration work begins. A well-managed insurance restoration project maintains regular communication with the homeowner, addresses any supplemental damage discovered during work, and keeps the project moving toward completion efficiently.

Common Delays and How to Avoid Them

Insurance restoration projects are vulnerable to delays at multiple points in the process. The most common include:

Incomplete initial documentation: Damage not documented during the initial documentation phase can require reinspection and renegotiation, adding weeks to the timeline. Document everything before anything is touched.

Scope disputes: When the contractor’s assessment of damage significantly exceeds the adjuster’s, negotiations take time. Working with a contractor who communicates professionally with adjusters and documents findings thoroughly minimizes these disputes.

Supplemental claims: Damage discovered during restoration that wasn’t included in the original claim requires a supplement and additional claim for the newly identified work. Experienced restoration contractors anticipate this and navigate it efficiently.

Contractor selection: Choosing the wrong contractor, one unfamiliar with the insurance restoration process, creates friction at every step. The contractor’s ability to communicate with your insurer in the right language matters as much as their construction skills.

Why Specialized Insurance Restoration Expertise Matters

Not every renovation contractor is equipped to handle insurance restoration effectively. The process requires:

  • Understanding of insurance claim processes and the ability to communicate with adjusters in a language they understand
  • Thorough damage assessment capabilities that capture the full scope of loss, including hidden and consequential damage
  • Code compliance knowledge: Many restoration projects trigger required code upgrades that need to be properly documented for inclusion in the claim
  • Project management experience, keeping a complex restoration project on schedule while navigating ongoing insurance communication, is a specialized skill.

At J.E.P. Contracting, our insurance restoration clients benefit from a single point of contact who manages both the construction and insurance communication processes. That coordination is what keeps projects moving and homeowners informed throughout recovery.

Conclusion

A damage event is never welcome, but with the right contractor guiding the process, insurance restoration can be managed efficiently and result in a home that’s fully restored, properly rebuilt, and genuinely better for the experience.

J.E.P. Contracting has the expertise, processes, and commitment to guide Worcester families through insurance restoration from the first call to the final walkthrough. We don’t just rebuild homes, we restore peace of mind.

Dealing with damage to your Worcester home? Contact J.E.P. Contracting today and let our insurance restoration team guide you through every step of the process.

Frequently Asked Questions

Q: Do I need a contractor before filing my insurance claim?

No, file your claim promptly with your insurer. However, getting a qualified contractor to assess the damage before accepting a settlement ensures the full scope of damage is accounted for in your claim.

Q: Can my insurance company require me to use a specific contractor?

No. In Massachusetts, you have the right to choose your own contractor for restoration work. Your insurer can recommend contractors, but the choice is yours.

Q: What if additional damage is found once restoration begins?

Additional damage discovered during work is handled through a supplemental claim. Your contractor documents and submits the supplement to your insurer. This is common in restoration projects, and experienced contractors navigate it as part of the process.

Q: How long does a typical insurance restoration project take?

It varies significantly based on the type and extent of damage. Fire and water damage projects can range from a few weeks to several months. Your J.E.P. Contracting project managers will give you a realistic timeline specific to your project once the scope is established.

Snowy two-story blue house with white trim and a front porch.

Exterior Upgrades Built for New England Weather: Siding, Roofing, and Beyond

March 15, 2026/in Blogs, Exteriors/by Patrick Perkins

Your home’s exterior takes a beating in Worcester. Between nor’easters, freeze-thaw cycles, summer humidity, and the occasional ice storm, central Massachusetts weather tests every material on your home’s façade. Exterior upgrades that look great on day one but fail within a decade aren’t an investment; they’re an expensive mistake.

At J.E.P. Contracting, we’ve spent over two decades helping Worcester homeowners choose and install exterior materials that perform beautifully year after year in New England conditions. Here’s what you need to know before planning your next exterior project.

Why New England Weather Demands a Different Standard

Not all climates ask the same things of exterior materials. In Worcester, your siding, roofing, trim, and windows face:

  • Freeze-thaw cycles that cause expansion and contraction in any material that holds moisture
  • Heavy snow and ice loads that test roofing systems and gutters
  • High humidity and summer heat accelerate paint failure and wood rot
  • Wind-driven rain that finds every gap in an improperly installed system

A material that performs adequately in a moderate climate may fail prematurely in ours. The combination of material selection and installation quality is what determines whether your exterior upgrade lasts 10 years or 40.

Siding: Choosing the Right Material for Worcester Homes

Siding is your home’s first line of defence against the elements and your most visible exterior investment. Each major siding category has real advantages and trade-offs worth understanding before you commit.

Vinyl Siding

Vinyl is the most widely used siding material in the country for good reason. It’s affordable, requires virtually no maintenance, and holds its color well. Modern vinyl siding has improved significantly; insulated vinyl products add thermal performance, and better formulations resist impact and UV fading better than previous generations.

The trade-off is that standard vinyl can become brittle in extreme cold, making it more susceptible to cracking from impact in the winter months. High-quality vinyl products mitigate this, but material grade matters enormously.

Fiber Cement Siding

Fiber cement products like James Hardie have become a favorite for New England homes, and for good reason. It’s dimensionally stable through temperature swings, moisture-resistant, impervious to rot and insects, and holds paint exceptionally well. It also convincingly mimics the look of wood clapboard.

The investment is higher than vinyl, but the longevity and performance in New England conditions make fiber cement one of the best long-term values available. We specify it frequently for Worcester homes and have seen it hold up beautifully over many years.

Wood and Cedar Siding

Wood siding, particularly cedar, has a timeless appeal that synthetic materials struggle to replicate. Cedar is naturally resistant to rot and insects, and when properly installed, finished, and maintained, it performs admirably in New England weather.

At J.E.P. Contracting, we have extensive experience with cedar siding and understand the specific installation and finishing details that determine its longevity. Proper back-priming, appropriate flashing at all penetrations, and a quality finish coat are non-negotiable. When these steps are followed, cedar siding is a premium, lasting choice and one that connects Worcester homes to their architectural heritage.

Maintenance is more demanding than fiber cement or vinyl, but for homeowners who value the authentic character of natural wood, it’s a worthwhile commitment.

Roofing: Performance Under Pressure

Your roof is arguably your home’s most critical exterior system. In Worcester, a roofing failure can lead to ice dams, water infiltration, and extensive, costly interior damage.

Architectural Asphalt Shingles

The most common residential roofing material, architectural (dimensional) asphalt shingles, has improved substantially in quality and longevity. High-quality products carry 30- to 50-year warranties and, when properly installed with adequate ventilation and ice-and-water shields at eaves and valleys, perform well in New England conditions.

Ice-and-water shield installation is particularly important in Worcester, extending this membrane well up the roof slope (typically a minimum of 6 feet from the eave) to protect against ice-dam water infiltration that Worcester winters can produce.

Metal Roofing

Standing seam metal roofing is growing in popularity in the Worcester area, and its New England performance credentials are strong. Snow sheds cleanly from a metal roof, ice damming is far less problematic than with shingles, and a quality metal roof can last 50 years or more with minimal maintenance. The upfront cost is higher, but the lifecycle economics are compelling for homeowners planning to stay in their home long-term.

Energy Efficiency: The Hidden Value of Exterior Upgrades

Exterior upgrades aren’t just about appearance and weather protection; they’re also a significant opportunity to improve your home’s energy performance.

Insulated siding adds continuous insulation around your home’s envelope, reducing thermal bridging through wall framing. The impact on heating bills in a Worcester winter is real and measurable.

Window replacement combined with siding projects is a natural pairing. New windows eliminate air infiltration at one of the biggest points of energy loss in older homes.

Roof insulation and ventilation improvements can simultaneously dramatically reduce ice dam formation and improve attic thermal performance.

Maintenance Tips for New England Exteriors

Even the best exterior materials require periodic attention to perform at their best.

  • Annual inspection of caulking at windows, doors, and penetrations. These are the first places moisture enters
  • Gutter cleaning in fall and spring to prevent water backup that contributes to ice dams and fascia rot
  • Wood siding repainting on the appropriate cycle, typically every 8–12 years for cedar, depending on exposure
  • Roof inspection after significant weather events, particularly for missing or damaged shingles

Conclusion

Exterior upgrades in Worcester aren’t just aesthetic choices; they’re performance decisions. The right materials, installed with the care and expertise New England conditions demand, protect your home and your investment for decades.

J.E.P. Contracting brings over 20 years of exterior work on Worcester homes to every project. We know which materials perform in our climate, how to install them correctly, and how to design exterior improvements that look exceptional and last.

Ready to upgrade your home’s exterior? Contact J.E.P. Contracting today for a free consultation, and let’s build an exterior that stands up to whatever New England throws at it.

Frequently Asked Questions

Q: What is the best siding material for a Worcester home?

Fiber cement siding offers the best balance of durability, low maintenance, and performance in New England conditions. Cedar is the premium choice for homeowners who prefer natural wood and are willing to maintain it. Vinyl is the most budget-friendly option when quality products are specified.

Q: How do I prevent ice dams on my roof?

Proper attic insulation and ventilation are the primary defences against ice dams. During reroofing, extending the ice-and-water shield well up from the eaves provides critical backup protection. Keeping gutters clear is also essential.

Q: How long should quality siding last in Massachusetts?

Fiber cement siding typically lasts 30–50 years with minimal maintenance. Quality cedar siding can last 20–40 years with proper maintenance and repainting. High-quality vinyl siding typically carries a 20–40 year warranty.

Q: Is it worth replacing windows at the same time as siding?

In most cases, yes. Combining window replacement with a siding project reduces labor costs, eliminates the disruption of a second project, and ensures that flashing and trim work around windows is done correctly once rather than twice.

Modern bathroom with a glass-enclosed shower, freestanding tub, and an olive-green double vanity with two sinks and mirrors

Bathroom Remodels That Blend Luxury, Function, and Everyday Practicality

February 15, 2026/in Bathroom Remodeling, Blogs/by Patrick Perkins

The bathroom is one of the most used rooms in your home and one of the most underestimated in terms of its impact on daily quality of life. A bathroom that functions poorly, looks dated, or lacks adequate storage doesn’t just frustrate you every morning; it also makes you feel like you’re living in a dated, cluttered space. It quietly diminishes your enjoyment of your home and leaves real value on the table when it comes time to sell.

A well-executed bathroom remodel changes all of that. Done right, it delivers a space that feels genuinely elevated without sacrificing the practicality that makes it work for real family life.

At J.E.P. Contracting, bathroom remodeling is one of our core strengths. We’ve designed and built bathrooms across the full range of Worcester homes, from practical hall bath upgrades to full primary suite transformations, and we bring the same design intelligence and construction quality to every project.

What Today’s Best Bathroom Remodels Have in Common

Whether the budget is modest or generous, the best bathroom remodels share a few defining characteristics: intentional layouts, smart material choices, thoughtful storage, and finishes that balance beauty with durability.

Trending Fixtures That Stand the Test of Time

Fixture trends in bathroom design have matured significantly. The most successful choices right now aren’t trendy for the sake of it; they’re elevated takes on functional essentials that will look fresh for years to come.

Walk-in showers continue to dominate primary bath design. Curbless (zero-threshold) entries look sleek, are easier to clean, and provide the accessibility that universal design principles recommend. Large-format tile, frameless glass, and integrated niche shelving elevate a walk-in shower from a basic necessity to a genuine retreat.

Freestanding soaking tubs remain a premium addition for primary baths where space allows. They create an architectural focal point and signal a commitment to relaxation, which resonates with buyers when you sell.

Wall-mounted fixtures, toilets, vanities, and even faucets create a clean, contemporary aesthetic while making floor cleaning significantly easier. They work beautifully in both modern and transitional design contexts.

Matte black and brushed gold hardware have moved beyond trend status into established territory. Both finishes are more forgiving to maintain than polished chrome and add warmth and character to bathroom spaces.

Smart Storage That Actually Works

Storage is where bathroom remodels most often fall short. A beautiful vanity that doesn’t hold everything you need isn’t serving you; it’s just an aesthetic choice.

Effective bathroom storage design accounts for what your household actually uses and stores: toiletries, medications, towels, cleaning supplies, hair tools, and more. Solutions worth incorporating include:

  • Double vanities for shared bathrooms dramatically reduce morning conflicts and provide dedicated storage for each user
  • Built-in niches in shower walls, recessed shelving that keeps products accessible without cluttering the floor
  • Tower cabinets and linen storage, adjacent to the vanity, vertical storage that maximizes square footage
  • Medicine cabinets with integrated lighting, recessed models that look custom and provide useful mirror-adjacent storage

The best bathroom storage solutions are designed during the planning phase, not added as an afterthought. When the same team handles design and construction, storage is built into the layout from day one.

Universal Design: Bathrooms That Work for Every Stage of Life

Universal design isn’t just for aging-in-place applications; it’s a design philosophy that makes bathrooms more comfortable and functional for everyone. In Worcester homes where multigenerational living is increasingly common, it’s also a practical necessity.

Features That Make a Difference

Curbless showers with linear drains eliminate trip hazards and are significantly easier to enter for anyone with mobility limitations, including young children, older adults, and anyone recovering from injury.

Blocking in walls during construction for future grab bar installation is a low-cost step that dramatically reduces the cost of adding grab bars later. This simple step is one we recommend to virtually every bathroom remodel client.

Wider doorways, ideally 36 inches wide, allow comfortable passage for wheelchairs, walkers, and strollers alike and are a smart inclusion in any significant bathroom renovation.

Comfort-height toilets (a few inches taller than standard) are easier to use for adults and older family members and cost little to specify during a remodel.

These features don’t compromise the aesthetic of a beautiful bathroom; they enhance its long-term value and livability for everyone who uses it.

Return on Investment: What a Bathroom Remodel Delivers

In the Worcester real estate market, bathroom remodels consistently deliver strong ROI. A mid-range bathroom remodel typically returns 60–70% of its cost in resale value, and in a competitive market, a well-designed bathroom can be the difference that earns a faster sale at a higher price.

The primary bath carries the most weight with buyers. But updated hall baths and half baths also contribute meaningfully to a home’s overall appeal. If you have a bathroom that’s functioning but looking its age, a targeted refresh can yield significant returns without a full gut renovation.

Conclusion

A bathroom remodel is one of the most rewarding home improvement investments you can make, combining daily quality-of-life improvements with genuine financial return. When it’s designed thoughtfully and built with skill, it becomes a space your household genuinely looks forward to using.

J.E.P. Contracting brings both design intelligence and construction expertise to every bathroom remodel we undertake. We listen to how you live, design around what you need, and build with quality that shows.

Ready to transform your bathroom? Schedule a free consultation with J.E.P. Contracting and let’s design a space that delivers luxury and practicality in equal measure.

Frequently Asked Questions

Q: How much does a bathroom remodel typically cost in Worcester? Costs range significantly based on size, scope, and materials. A hall bath refresh can start in the mid-thousands, while a full primary bath transformation ranges from $25,000 to $60,000 or more. A consultation with J.E.P. Contracting provides a realistic estimate based on your specific goals.

Q: How long does a bathroom remodel take? Most bathroom remodels take three to six weeks once construction begins. Custom tile work, specialty fixtures, or significant structural changes can extend the timeline. Your project manager will give you a specific schedule before work begins.

Q: Can I add universal design features to my bathroom without making it look clinical? Absolutely. Modern universal design integrates seamlessly into contemporary and transitional bathroom aesthetics. Curbless showers, comfort-height fixtures, and wider doorways look and feel like standard design choices, not accessibility accommodations.

Q: What is the best ROI bathroom remodel for resale value? Primary bathrooms offer the highest return, particularly when outdated fixtures, tile, and layouts are addressed. Double vanities, walk-in showers, and quality finishes consistently resonate with buyers in the Worcester market.

Open-concept living room with a beige L-shaped sectional facing a dark built-in entertainment wall and electric fireplace, flanked by shelves and a large TV.

Basement Transformations: Turning Unused Space into Functional Family Areas in Worcester Homes

January 15, 2026/in Basement, Blogs/by Patrick Perkins

Most Worcester homeowners are sitting on hundreds of square feet of untapped potential. It’s right beneath their feet in a basement that’s currently used for storage, laundry, or nothing at all. With thoughtful planning and skilled execution, that underutilized space can become a family room, home office, guest suite, home gym, or playroom that your household uses every single day.

At J.E.P. Contracting, basement transformations are among our most requested and rewarding projects. We’ve seen the look on families’ faces when they walk into a finished basement for the first time and realize how dramatically their home has changed. That reaction never gets old.

Here’s what goes into doing it right in a Worcester home.

The Unique Challenges of New England Basements

Finishing a basement in central Massachusetts isn’t quite the same as finishing one in a drier climate. Worcester’s weather, with its cold winters, humid summers, and significant seasonal precipitation, creates conditions that demand specific solutions before any finishing work begins.

Moisture Management Comes First

Moisture is the single biggest threat to a finished basement in New England. Before a single stud wall goes up or a square foot of flooring is laid, moisture issues must be identified and addressed. That means evaluating your foundation walls, drainage patterns, sump pump performance, and existing waterproofing.

Depending on what we find, solutions may include interior drainage systems, sump pump upgrades, vapor barriers, or exterior grading corrections. Skipping this step and framing over a moisture problem is a common and costly mistake. At J.E.P. Contracting, we don’t cut corners because the durability of everything that follows depends on getting moisture management right.

Insulation for Comfort and Efficiency

Worcester winters are cold. Basement insulation isn’t just about comfort; it directly impacts your home’s energy efficiency and the livability of the finished space. Rigid foam insulation on foundation walls, combined with proper framing and batt insulation in stud walls, creates a thermal envelope that keeps the space warm in winter and cool in summer.

Done well, a finished basement can be just as comfortable as any room above grade without the energy penalty of heating an uninsulated space.

Designing a Basement That Works for Your Family

Once the foundational issues are resolved, the design phase is where a basement really comes to life. The best basement layouts are purpose-driven, designed around how your family actually lives, not just how a space looks in a floor plan.

Layout Options Worth Considering

Family Room / Media Room: The most popular basement finish in Worcester homes. A large, open layout with recessed lighting, built-in storage, and a designated media wall creates a gathering space that pulls the family together.

Home Office: With remote and hybrid work now common, a quiet, dedicated office in the basement offers separation from household activity. Proper egress, lighting, and HVAC zoning make it a professional environment.

Guest Suite: A basement bedroom with a full bathroom adds functional square footage and genuine value to your home. Egress window requirements apply, and we design these spaces to meet all applicable building codes.

Kids’ Playroom / Teen Hangout: Durable flooring, smart storage solutions, and easy-clean surfaces make a basement playroom one of the most practical investments a family with young children can make.

Multi-Use Spaces: Many of our clients choose hybrid layouts, a finished area that serves as both a workout space and a family room, or a home office with a guest sleeping area. Good design makes these combinations work without compromise.

Lighting: Solving the Biggest Design Challenge

Basements present a real lighting challenge, especially in Worcester homes where window wells may be small or few in number. The right lighting strategy transforms a basement from dim and cave-like to bright and welcoming.

Recessed LED lighting is the foundation of most basement lighting plans. Layering in under-stair lighting, sconces, and strategically placed fixtures creates a space that feels intentionally designed rather than improvised. Where egress windows are required or desired, enlarging openings also improves natural light, a dual-purpose improvement that’s worth every dollar.

Egress: Safety That’s Non-Negotiable

If your finished basement includes a bedroom or any space where someone might sleep, egress windows are required by building code. These windows must meet specific size and height-from-floor requirements to allow emergency exit. At J.E.P. Contracting, we design egress solutions that meet code requirements and integrate seamlessly into the space’s overall aesthetic.

Budgeting with the Design-Build Approach

One of the most common frustrations homeowners face with basement projects is budget surprises and cost overruns that emerge midway through because a contractor didn’t anticipate what they’d find. The design-build model significantly reduces this risk.

When the same team manages design and construction, estimates are grounded in actual site conditions and construction realities, not optimistic guesses. We assess moisture conditions, structural factors, and mechanical system impacts before providing a budget, so there are fewer surprises once work begins.

Basement transformations in Worcester homes typically range widely based on size, scope, and finish level. A consultation with our team gives you a realistic, honest number specific to your home, not a generic ballpark that leaves you guessing.

Conclusion

A finished basement is one of the best investments available to Worcester homeowners. It adds usable square footage, improves your home’s functionality, and enhances its market value all without expanding your home’s footprint.

The key is doing it right: addressing moisture first, designing for real family use, and executing with quality craftsmanship that lasts.

J.E.P. Contracting has been transforming basements in Worcester for over two decades. We know the challenges these spaces present, and we have the expertise to turn them into some of the most-used rooms in your home.

Ready to see what your basement could become? Schedule a free consultation with J.E.P. Contracting today, and let’s start designing a space your family will love.

Frequently Asked Questions

Q: How do I know if my basement has a moisture problem before finishing it?

Signs include musty odors, visible efflorescence (white mineral deposits) on walls, staining at the base of walls, or a history of water intrusion after heavy rain. Our team conducts a thorough assessment before any finishing work begins.

Q: Do I need an egress window in my finished basement?

If the basement includes a bedroom or sleeping area, yes, egress windows are required by the Massachusetts building code. We design egress solutions that meet all requirements and look great.

Q: How long does a basement transformation take?

Most basement finishing projects take 6 to 12 weeks, depending on scope, complexity, and permitting. Projects that require significant moisture remediation or egress window installation may take longer.

Q: Will finishing my basement increase my home’s value?

Yes. A professionally finished basement consistently delivers strong ROI in the Worcester market, adding usable square footage and meaningful appeal to prospective buyers.

Accessory Dwelling Units (ADUs) in Worcester: A Smart Way to Add Space, Income, or Family Support to Your Home

December 15, 2025/in Accessory Dwelling Units, Blogs/by Patrick Perkins

Your home is one of your most valuable assets, and in Worcester, more homeowners are finding a smart way to make it work even harder. Accessory Dwelling Units (ADUs) are gaining momentum across Massachusetts, and for good reason. Whether you want to bring an aging parent closer, generate steady rental income, or add flexible living space for a growing family, an ADU could be the most practical investment you make in your home this decade.

At J.E.P. Contracting, we’ve helped Worcester families navigate major home projects since 2002. ADUs are among the most exciting additions to our design-build portfolio, and we’re here to walk you through everything you need to know.

What Is an ADU and Why Is Worcester Embracing Them?

An Accessory Dwelling Unit is a secondary, self-contained living space on a residential property. It can take many forms: a converted basement apartment, an above-garage suite, a detached backyard cottage, or an addition attached to your existing home. What makes ADUs especially appealing in Worcester is that they provide real utility without requiring a second property purchase.

Massachusetts has made it easier than ever to build an ADU. Under the state’s updated zoning laws, single-family homeowners have by-right approval for ADUs up to 900 square feet, meaning you don’t need a special permit or variance in most cases. That’s a significant shift that removes one of the biggest historical barriers to ADU construction.

Worcester’s housing market also plays a role. With rental demand strong and home prices remaining competitive, an ADU gives you options: live-in flexibility today, rental income tomorrow, or multigenerational support whenever the family needs it.

The Multigenerational Living Advantage

One of the most compelling reasons Worcester families are building ADUs is the ability to keep families close without sacrificing independence. An aging parent or in-law can live in a comfortable, private space on the same property, eliminating the need for expensive assisted living facilities while maintaining dignity and proximity.

This setup works equally well for adult children who need a transitional space or for families who want a dedicated guest suite that doubles as long-term housing. The feedback we hear most often from clients who’ve built in-law apartments is that they wish they had done it sooner.

Rental Income That Works for You

A well-designed ADU in Worcester can generate meaningful monthly rental income. Whether you list it as a long-term rental or an Airbnb-style short-term unit, the income potential can offset your mortgage, fund home improvements, or add financial breathing room to your household budget.

When designed properly from the start with the right layout, finishes, and systems, an ADU commands better rental rates and attracts reliable tenants. That’s where the design-build approach makes a real difference.

Understanding Massachusetts ADU Rules: What You Need to Know

Before breaking ground, it’s worth understanding the current regulatory landscape in Massachusetts.

The By-Right 900 Sq Ft Rule

Thanks to recent zoning reform, Massachusetts homeowners on single-family lots can build an ADU of up to 900 square feet without going through a lengthy special permit process. This by-right approval applies to both attached and detached units, and significantly reduces the time and cost of getting started.

There are still local requirements to navigate, including building permits, setback regulations, utility connections, and parking minimums in some municipalities. Worcester has its own specific guidelines, and navigating them correctly from the outset saves significant time and money.

What About Larger ADUs?

If your vision exceeds 900 square feet, you may need a special permit or a variance from the City of Worcester. These cases require a more involved approval process, but they’re certainly achievable, especially when your project is well-documented and professionally presented.

Working with an experienced design-build contractor who understands local zoning nuances makes the difference between a project that moves forward efficiently and one that stalls in bureaucratic review.

The J.E.P. Contracting Design-Build Advantage for ADUs

Building an ADU isn’t just a construction project; it’s a planning challenge, a design opportunity, and a regulatory process all wrapped into one. That’s exactly why the design-build model is the right fit.

At J.E.P. Contracting, design and construction happen under one roof. We don’t hand off your project between an architect and a general contractor who may never be on the same page. From initial concept through final walkthrough, your project is managed by a single team with a shared vision.

Here’s what that looks like in practice:

Discovery and Planning: We start by understanding how you intend to use the ADU now and in the future. Your goals shape everything: layout, entry points, accessibility features, and systems.

Design: Our team develops a design that integrates seamlessly with your existing home’s architecture and your property’s footprint, while meeting Worcester’s local code requirements.

Permitting: We handle the permitting process on your behalf, leveraging our knowledge of Worcester building requirements to minimize delays.

Construction: Our experienced crews build with the care and craftsmanship that J.E.P. Contracting has delivered to Worcester families for over two decades.

Completion: You receive a finished, move-in-ready space, whether it’s a rental unit, an in-law suite, or a private retreat.

Is an ADU Right for Your Property?

Not every lot or home configuration is equally suited for an ADU, but more Worcester properties qualify than homeowners typically assume. A brief consultation can quickly clarify your options, identify any site-specific constraints, and help you see the realistic possibilities for your specific home.

The best time to start that conversation is before you’ve committed to a specific approach. Coming in with an open mind lets us design the most effective solution for your situation, whether that’s a basement conversion, a garage conversion, a backyard cottage, or a modest addition.

Conclusion

ADUs represent one of the smartest, most versatile investments a Worcester homeowner can make. Whether your priority is family support, rental income, or long-term flexibility, the right ADU adds genuine financial and personal value to your home.

J.E.P. Contracting has spent over 20 years helping Worcester families build homes and spaces that meet real needs. We bring that same commitment, craftsmanship, and family-centered approach to every ADU project we take on.

Ready to explore what an ADU could look like on your property? Request a free consultation with J.E.P. Contracting today. Let’s talk through your goals and build a plan that works for your family.

Frequently Asked Questions

Q: Do I need a special permit to build an ADU in Worcester, MA?

For units up to 900 square feet on a single-family lot, Massachusetts now allows by-right approval with no special permit required in most cases. Local building permits are still necessary, and Worcester has specific guidelines that apply.

Q: How long does it take to build an ADU?

Most ADU projects take between 4 and 8 months from design through completion, depending on complexity, permitting timelines, and whether the unit is attached or detached.

Q: Can I rent out an ADU on my property?

Yes. Worcester homeowners can rent ADUs as long-term or short-term units, subject to local rental regulations and any applicable short-term rental rules.

Q: How much does it cost to build an ADU in Worcester?

Costs vary significantly based on unit size, type (basement conversion vs. new construction), and finishes. A detailed consultation with J.E.P. Contracting will give you a realistic, project-specific budget.

Building Community for Sutton High Softball: From Slab to Game-Ready Dugout

November 15, 2025/in Blogs/by Patrick Perkins

J.E.P Contracting partnered with the Sutton High School Girls Softball program to create a durable, low-maintenance dugout the team can rely on in any weather. Our crew handled everything—from site prep and a poured concrete slab to framing, roofing, siding, and a Sutton-green finish—ensuring players have a safe, organized space for practices and game days.

1) Foundation that lasts

We prepped the site, set forms, and poured a reinforced concrete slab to anchor the structure and improve drainage—critical for a long service life on a high-traffic field.

2) Framing The Structure

With the base in place, J.E.P Contracting framed the walls and lean-to roof—simple, strong geometry that fits the fence line and maximizes covered space

3) Sheathing & Siding For Durability

Next came structural sheathing and durable exterior siding to handle Massachusetts weather and everyday team use.

4) Weather-Ready Roofing

We finished the roof with architectural asphalt shingles on solid decking, complete with drip edge and trim for long-term protection.

5) School-Color Finish

The exterior received a Sutton-green finish with clean trim—an immediate boost to field pride and a cohesive look with the campus.

6) Ready For Game Day

Inside, the open layout and bench seating keep players and gear dry, organized, and ready between innings. The result is a simple, robust space built for many seasons.

Community, Trust, And Long-Term Partnership

Projects like this are about more than construction-they’re about showing up for our community. J.E.P Contracting values the relationships we build on the field, which often lead to new ways to help; in fact, our work on the Sutton dugout has grown into replacing the windows in the school auditorium. We’re proud to be a partner that families and staff can count on across Massachusetts.


stylemaker-secret-white-den-b21ab396-d2636ff8d24449a99561054dc983475b

Budget-Friendly Renovations That Don’t Sacrifice Style or Quality

August 15, 2025/in Blogs/by Patrick Perkins

Dreaming of a home makeover but worried about breaking the bank? Good news: a beautiful, functional space doesn’t have to come with a hefty price tag. With smart planning, creative solutions, and a focus on value, you can achieve stunning renovations without sacrificing style or quality.

Let’s explore budget-friendly renovation ideas that help you make the most of every dollar while transforming your space into something truly special.

10 home renovations you can DIY on a budget | Bankrate

Start with a Plan: Prioritize and Budget

The first step in any successful renovation—especially on a budget—is planning. Identify which areas need the most attention and where your investment will have the biggest impact.

Tips to get started:

  • Create a list of must-haves vs. nice-to-haves.
  • Set a realistic budget and stick to it.
  • Get multiple estimates for larger projects.
  • Factor in a contingency fund for unexpected expenses (typically 10-15%).

Clear priorities help you allocate resources effectively and avoid overspending. It also allows you to make confident decisions when it comes to where to save and where to splurge.

Focus on High-Impact Areas

When renovating on a budget, focus on spaces that offer the greatest return in function, aesthetics, or value.

Key areas to consider:

  • Kitchens: Update cabinets with paint or new hardware, install a backsplash, or upgrade lighting.
  • Bathrooms: Swap out fixtures, refresh grout, or install a new vanity.
  • Living Rooms: Add fresh paint, new curtains, or a statement light fixture.

Small changes in these areas can dramatically elevate the look and feel of your home. Remember, it’s often the little things—like lighting and color—that make the biggest difference.

Cosmetic Updates: Big Impact, Small Cost

Not every renovation requires major construction. Cosmetic upgrades can breathe new life into a space.

Ideas to try:

  • Paint walls, cabinets, or furniture for an instant refresh.
  • Replace outdated hardware (knobs, pulls, faucets).
  • Install peel-and-stick backsplash or wallpaper.
  • Update light fixtures or add dimmers for ambiance.

These low-cost updates add style without major disruption or expense. A fresh coat of paint alone can transform a room, making it feel new and vibrant.

Repurpose and Reuse: Creative and Cost-Effective

Before buying new, consider what you already have.

Smart reuse tips:

  • Refinish or repaint old furniture.
  • Use leftover tiles for accent walls or small projects.
  • Repurpose materials from salvage yards or resale shops.

DIY projects can add personality and charm while saving money. Customizing secondhand finds is not only economical but also results in unique, one-of-a-kind decor.

Shop Smart: Deals and Alternatives

Finding stylish materials at lower costs is easier than you think.

Where to save:

  • Shop sales, clearance, or outlet stores.
  • Consider open-box or gently used appliances.
  • Explore alternatives like laminate instead of stone countertops or vinyl plank flooring instead of hardwood.

Mixing high and low-end elements can create a luxe look for less. Keep an eye out for seasonal sales, and don’t be afraid to negotiate for better deals with local suppliers.

Do It Yourself (Where It Makes Sense)

Tackling projects yourself can save labor costs, but it’s important to know your limits.

DIY-friendly tasks:

  • Painting
  • Installing shelves or curtain rods
  • Laying peel-and-stick flooring

Leave plumbing, electrical, or structural work to the pros to avoid costly mistakes. However, even simple DIY upgrades can add immense value and a sense of accomplishment.

Maximize Space: Layout and Storage Solutions

Sometimes, better use of space makes more difference than adding square footage.

Ideas to improve layout:

  • Rearrange furniture for better flow.
  • Add built-in or modular storage.
  • Use mirrors to make spaces feel larger and brighter.

Maximizing existing space is a budget-friendly way to improve functionality. Open shelving, multi-functional furniture, and smart storage solutions help make your home feel more spacious and organized.

image

#image_title

Renovate in Phases: Tackle Projects Over Time

If your budget is tight, consider renovating in stages. Prioritize urgent or high-impact projects first and plan others for later.

Phased renovation plan:

  1. Immediate fixes (leaks, damaged flooring)
  2. Cosmetic updates (paint, lighting)
  3. Larger upgrades (cabinets, appliances)

This approach allows you to manage costs, reduce stress, and maintain flexibility in your budget.

Use Virtual Tools and Apps: Plan Like a Pro

Technology can help you visualize your renovation and make informed choices.

Helpful tools:

  • Design apps for room layouts and color schemes
  • Budget calculators
  • Online marketplaces for deals on materials and furnishings

These tools empower you to make smart decisions, save time, and avoid costly mistakes.

Sustainability: Save Money and the Planet

Eco-friendly renovations can be budget-friendly too.

Sustainable upgrades:

  • Energy-efficient lighting and appliances
  • Low-flow plumbing fixtures
  • Recycled or reclaimed materials

These changes reduce utility bills and environmental impact—a win-win for your wallet and the planet.

Don’t Forget Curb Appeal: Affordable Outdoor Updates

First impressions matter. Budget-friendly exterior updates can boost your home’s value and charm.

Ideas:

  • Fresh paint on doors and trim
  • New house numbers or mailbox
  • DIY landscaping (mulch, plants, garden borders)

Simple touches outside create a welcoming look and increase curb appeal.

Final Thoughts: Style, Quality, and Smart Spending

Renovating on a budget doesn’t mean cutting corners. With thoughtful planning, creative solutions, and a focus on value, you can achieve stylish, high-quality results without overspending.

Your home should reflect your personality and support your lifestyle—and with smart choices, you can create a space you love, at a price you can afford. Remember, it’s not about how much you spend, but how well you spend it.


images-4

How to Choose the Right Contractor (And Avoid Renovation Regrets)

July 15, 2025/in Blogs/by Patrick Perkins

Starting a home renovation is exciting—but let’s be honest, it can also feel overwhelming. Between budgets, design decisions, and timelines, there’s a lot to juggle. At the heart of it all is one critical choice: your contractor. The right contractor can make your renovation smooth and rewarding, while the wrong one can turn it into a stressful, costly experience.

So how do you choose the right contractor? Let’s explore key steps and tips to help you find a trustworthy partner for your project and avoid the most common renovation regrets.

How to Choose the Right Contractor for Your Home Construction Project -  BigStartups

Start with Clarity: Know What You Want

Before you even begin searching for contractors, take time to clearly define your project.

Ask yourself:

  • What is the scope of my renovation? (e.g., kitchen remodel, bathroom upgrade, full home renovation)
  • What is my budget range?
  • What is my ideal timeline?
  • Are there any must-have features or styles I want?

Having a clear vision helps you communicate effectively with potential contractors and ensures you’re all on the same page from the start.

Creating a written list of needs and wants can help prioritize. For example, you might need more functional kitchen space, but want marble countertops. Understanding the difference helps during budgeting and when making decisions on where to invest.

Do Your Research: Referrals and Reviews Matter

Word-of-mouth referrals are gold when it comes to finding a reliable contractor. Ask friends, family, or neighbors who’ve completed similar projects about their experiences.

Other research tips:

  • Check online reviews on platforms like Google, Yelp, or Houzz.
  • Explore contractor websites to see past projects and client testimonials.
  • Look for professional affiliations or certifications (e.g., NARI, BBB).

Visit local home improvement shows or expos where contractors often showcase their work. Meeting face-to-face can provide an early sense of their professionalism and approach.

Interview Multiple Contractors: Ask the Right Questions

Don’t settle on the first contractor you meet. Interview at least three candidates to compare expertise, communication styles, and pricing.

Questions to ask:

  • How long have you been in business?
  • Can you provide references from recent clients?
  • Are you licensed, bonded, and insured?
  • Who will be managing my project day-to-day?
  • What is your estimated timeline and payment schedule?
  • How do you handle unexpected issues or changes?

Ask about similar projects they’ve completed and challenges they encountered. This reveals how they solve problems and adapt.

Evaluate Proposals: Apples to Apples

When you receive quotes or proposals, it’s essential to compare them fairly.

What to look for:

  • Detailed breakdown of labor and materials
  • Clear payment terms
  • Timeline for each project phase
  • List of subcontractors and suppliers

Avoid choosing purely based on the lowest bid. Often, a significantly lower quote can mean lower quality materials or rushed labor. Value, not just price, should guide your decision.

Review the Contract: Details Matter

Once you’ve chosen a contractor, a detailed written contract is essential.

A good contract includes:

  • Project scope and specifications
  • Materials to be used
  • Payment schedule and terms
  • Project timeline and completion date
  • Procedures for changes or delays
  • Warranty information

Never rely on verbal agreements. A clear contract protects both parties and sets expectations. It should also detail how disputes will be resolved, helping avoid conflicts.

Communication is Key: Stay Informed

Ongoing communication with your contractor ensures your project stays on track.

Communication tips:

  • Set up regular check-ins or updates.
  • Use written communication for key decisions.
  • Keep a record of changes and approvals.

A contractor who listens, responds promptly, and keeps you informed is invaluable. Open lines of communication can help resolve issues before they escalate.

Trust Your Instincts: Comfort Counts

Skills and experience matter, but so does trust and rapport. You’ll be working closely with your contractor, so choose someone you feel comfortable with.

Signs of a good fit:

  • You feel heard and respected.
  • They are transparent and honest.
  • They show enthusiasm for your project.

If something feels off during the early stages, it’s okay to keep looking. Your peace of mind is worth it.

Red Flags to Watch For

Not all contractors are created equal. Beware of:

  • Pressure to make quick decisions
  • Lack of proper documentation or insurance
  • Vague or incomplete estimates
  • Unwillingness to provide references
  • Extremely low bids (could indicate cutting corners)

Also, avoid contractors who demand large upfront payments. Standard practice is a reasonable deposit with payments tied to project milestones.

Check Credentials and Insurance

Your contractor should have valid licenses and insurance.

Verify:

  • State or local license numbers
  • General liability insurance
  • Workers’ compensation insurance

This protects you from liability and ensures the contractor meets legal requirements. Request copies and verify them with the appropriate agencies.

How to Choose the Right Contractor for Your Home Project - Leading  Construction Company in Guwahati, Assam - Ratepersqft Infra.

Visit Current Job Sites

Seeing a contractor’s current work can offer insights into their quality and professionalism. Observe:

  • Site cleanliness and safety
  • Worker behavior and professionalism
  • Project organization

A well-managed job site reflects a contractor’s attention to detail and respect for your property.

Post-Project Support

Ask about post-project support. Will the contractor address issues after completion? What is their warranty policy? A reputable contractor stands by their work.

Final Thoughts: Choose with Confidence

Choosing the right contractor is the foundation of a successful renovation. With clear goals, thorough research, and open communication, you can find a partner who brings your vision to life—without the regrets.

Take your time, ask questions, and trust the process. The right contractor will not only deliver quality work but also make your renovation journey smoother, more enjoyable, and truly rewarding.

Your home is your sanctuary. Choosing the right person to improve it is one of the most important decisions you’ll make. Invest the time and effort upfront, and you’ll reap the rewards for years to come.


images-3

Building Your Forever Home: What to Expect with Custom Home Construction

June 15, 2025/in Blogs/by Patrick Perkins

There’s something truly special about living in a home that was designed and built just for you. Every detail—from the floor plan to the finishes—reflects your personal style, needs, and dreams. Custom home construction is more than a project; it’s a journey, one that results in a space that feels uniquely yours.

But what does it take to bring a dream home to life? What steps are involved, and what can you expect along the way? Let’s explore the process of building your forever home and how thoughtful planning and collaboration turn your vision into reality.                        

Custom Home Building Construction Phases Explained | Guardian Homes

Step One: Dreaming and Planning

Every great home begins with a dream. Maybe you imagine a spacious kitchen for family gatherings, a cozy reading nook, or a luxurious primary suite. The first step is turning those dreams into a clear vision.

Questions to consider:

  • What size and layout do I need?
  • What is my budget range?
  • Where do I want to build?
  • What are my must-have features?

Working with a designer or architect, you’ll explore possibilities, gather inspiration, and begin to outline your ideal home. This phase often includes creating mood boards, sketches, and a list of priorities to guide the project.

Consider your lifestyle and how you use your space. Are you a passionate cook needing a gourmet kitchen? Do you love to entertain and want open spaces for gatherings? Are you planning for future needs, such as a growing family or aging in place? Identifying your goals early ensures your custom home fits your life.

Step Two: Selecting the Right Team

Building a custom home requires a team of skilled professionals, including architects, builders, and interior designers. Choosing the right team is crucial to the success of your project.

Look for:

  • Experience with custom homes
  • Transparent communication and collaboration
  • A portfolio of past projects
  • Strong references and reviews

A good builder doesn’t just construct homes—they guide, support, and problem-solve throughout the journey. Trust and communication are key. You’ll be working closely with this team, so finding professionals who understand your vision and share your values is essential.

Step Three: Designing Your Home

This is where your vision starts to take shape. During the design phase, you’ll work with architects to develop detailed plans and blueprints. This includes everything from the overall layout to the placement of windows, doors, and electrical outlets.

Design considerations:

  • Natural light and views
  • Traffic flow and room function
  • Storage solutions
  • Future needs and flexibility

The design phase is also when you’ll choose materials, finishes, and fixtures. From flooring and cabinetry to countertops and lighting, each decision contributes to the overall look and feel of your home.

Sustainability is becoming a priority for many homeowners. Energy-efficient windows, eco-friendly insulation, and solar panels are just a few options that can reduce your home’s environmental impact and lower utility bills. Smart home technology is another popular choice, allowing you to control lighting, temperature, and security from your smartphone.

Step Four: Permits and Preparation

Before construction begins, necessary permits and approvals must be secured. Your builder typically handles this process, ensuring that all local codes and regulations are met.

Pre-construction steps:

  • Site preparation and grading
  • Utility connections and infrastructure planning
  • Ordering materials and scheduling subcontractors

This phase sets the foundation—both literally and figuratively—for a smooth construction process. Depending on your location, permits can take time, so planning ahead is essential. During this phase, it’s also a good idea to finalize your financing if needed and ensure everything is in place for a seamless start.

Step Five: Building Begins

With plans in hand and permits secured, construction begins. This phase can take several months, depending on the complexity and size of the home.

Key stages:

  • Foundation and framing
  • Roofing and exterior finishes
  • Electrical, plumbing, and HVAC installation
  • Insulation and drywall
  • Interior finishes (flooring, cabinetry, paint)

Regular site visits and communication with your builder keep you informed and involved. Watching your home take shape is one of the most exciting parts of the process.

Delays can happen—weather, supply chain issues, or unexpected site conditions can affect timelines. Flexibility and ongoing communication help navigate these challenges. A reputable builder will keep you updated and work to minimize disruptions.

Step Six: Final Touches and Move-In

As construction wraps up, final inspections ensure everything meets quality and safety standards. Your builder will address any last-minute details and walk you through your new home.

Before move-in:

  • Final cleaning and preparation
  • Orientation on home systems and maintenance
  • Addressing any punch-list items (small fixes or adjustments)

Now it’s time to settle in and make your house a home, filled with memories and moments.

Custom Features That Make a Difference

Part of the joy of custom home building is the ability to include features that reflect your lifestyle and enhance daily living.

Popular custom features:

  • Walk-in pantries and custom closets
  • Home offices and study nooks
  • Spa-inspired bathrooms
  • Outdoor kitchens and entertainment areas
  • Multi-functional mudrooms

Think about how your home can simplify your life, support your hobbies, and create a sense of sanctuary.

Budgeting Wisely: Planning for Success

A well-planned budget is key to a successful custom build. It’s important to account for both expected and unexpected costs.

Budget tips:

  • Set priorities and allocate funds accordingly
  • Include a contingency for unforeseen expenses
  • Review estimates and contracts carefully
  • Monitor costs throughout the project

Your builder can help guide budgeting decisions, offering insight into where to invest for the best value and impact.

Emotional Rewards: More Than Just a House

Custom home building is a journey that requires time, patience, and effort, but the rewards are profound. Living in a space that was crafted for you, that reflects your taste and supports your lifestyle, brings deep satisfaction and pride.

Every room tells a story—of your choices, your dreams, and your journey. A custom home becomes a backdrop for life’s moments, big and small.

Final Thoughts: Your Forever Home

Building a custom home is about more than bricks and beams. It’s about creating a space that reflects who you are and how you live. It’s about comfort, function, and beauty all coming together in perfect harmony.

While the journey requires time, effort, and investment, the result is a home that’s truly yours—a place to grow, celebrate, and enjoy for years to come. Your forever home isn’t just built; it’s crafted with care and designed for life.

With the right planning and team, your dream home can become a reality—a space where you can truly live, love, and thrive.


Page 1 of 212

Recent Blogs

  • kitchen-renovation-oxford-ma
    Kitchen Renovation – Oxford, MA
  • second-floor-kitchen-renovation-millbury-ma
    Second Floor & Kitchen Renovation – Millbury, MA
  • upton-gentili-after-03
    Best Clay Art Studio in Upton, MA | Pottery & Ceramics Upton

Contact Info

J.E.P. Contracting, Inc.
22 West Street, No. 23 Millbury, MA 01527

508-865-4063
info@jepcontracting.com

Quick Links

Kitchen Renovations
Major Insurance Renovations
Portfolio Of All Work

Get Social with JEP CONTRACTING, INC!

Copyright © 2026 - J.E.P. Contracting | Privacy Policy | Terms of Service | Website by Cold Spring
  • Link to Facebook
  • Link to Pinterest
  • Link to LinkedIn
  • Link to Icon_name
Scroll to top Scroll to top Scroll to top

This site uses cookies. By continuing to browse the site, you are agreeing to our use of cookies.

Accept

Cookie and Privacy Settings


How we use cookies

We may request cookies to be set on your device. We use cookies to let us know when you visit our websites, how you interact with us, to enrich your user experience, and to customize your relationship with our website.

Click on the different category headings to find out more. You can also change some of your preferences. Note that blocking some types of cookies may impact your experience on our websites and the services we are able to offer.

Essential Website Cookies

These cookies are strictly necessary to provide you with services available through our website and to use some of its features.

Because these cookies are strictly necessary to deliver the website, refusing them will have impact how our site functions. You always can block or delete cookies by changing your browser settings and force blocking all cookies on this website. But this will always prompt you to accept/refuse cookies when revisiting our site.

We fully respect if you want to refuse cookies but to avoid asking you again and again kindly allow us to store a cookie for that. You are free to opt out any time or opt in for other cookies to get a better experience. If you refuse cookies we will remove all set cookies in our domain.

We provide you with a list of stored cookies on your computer in our domain so you can check what we stored. Due to security reasons we are not able to show or modify cookies from other domains. You can check these in your browser security settings.

Google Analytics Cookies

These cookies collect information that is used either in aggregate form to help us understand how our website is being used or how effective our marketing campaigns are, or to help us customize our website and application for you in order to enhance your experience.

If you do not want that we track your visit to our site you can disable tracking in your browser here:

Other external services

We also use different external services like Google Webfonts, Google Maps, and external Video providers. Since these providers may collect personal data like your IP address we allow you to block them here. Please be aware that this might heavily reduce the functionality and appearance of our site. Changes will take effect once you reload the page.

Google Webfont Settings:

Google Map Settings:

Google reCaptcha Settings:

Vimeo and Youtube video embeds:

Other cookies

The following cookies are also needed - You can choose if you want to allow them:

Privacy Policy

You can read about our cookies and privacy settings in detail on our Privacy Policy Page.

Accept settingsHide notification only